

How to Check Serial Number in Windows
Checking the serial number of any laptop can be pretty straight forward in most cases; turn it over and it stares right at you or pop out the battery in the case of some HP laptops and it’s written under the battery.
In some situations however, like when it has been scratched off or for warranty verification, it might be necessary to go beyond just checking the back. Checking the serial number from within Windows can also come in handy when buying a used laptop to verify if the motherboard has been replaced before, as a new motherboard would always carry a different serial number from that written at the back.
Without further ado, let’s get right into it.
Step One
Click on the Windows button and type “CMD” without quotes into the search bar.

Step Two
Launch the command prompt (CMD) and proceed to enter the following command.

Step Three
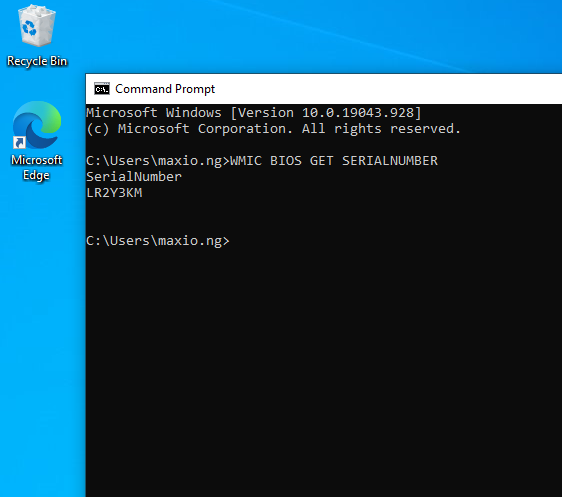
Type the following command without the quotes and press the enter key on your keyboard – “WMIC BIOS GET SERIALNUMBER”

Step Four
Let’s verify with what is written at the back.

On Dell computers, the serial number is referred to as “Service Tag”.
